The aim of this documentation is to familiarize you with your integration API, and provide the necessary documentation to get you developing quickly. All Lexamica integration APIs use the RPC protocol which you can learn more about here and/or read about REST vs RPC.
You may find that many RPC APIs use either the JSON-RPC Protocol or the XL-RPC Protocol. While both of these protocols have merits, Lexamica integration APIs use a modified protocol that is more JSON-friendly to aid integrating developers while they get their integrations up and running.
An important concept to consider as you interact with this integration API is that Lexamica integration APIs are meant to be action-oriented in their approach to requests and responses. This means that the URLs you will call should tell you what kind of action you're requesting from the API. It may help you to think of the URL as the function call, and the request body as the function parameters. In this approach, Lexamica integration APIs are similar to Slack's RPC API.
Hopefully this information and context was helpful. If you have more questions, definitely reach out to your Lexamica technical contact, but for now, let's jump into the technical info.
Lexamica integration APIs require Bearer Tokens to make requests on behalf of user's in a Lexamica Law Firm. The only exception is the /integration/connect route which only uses auth credentials generated by Lexamica.
Bearer tokens should be included in the Authorization request header in the following format: Bearer eyJhbGciOiJSUzI1NiIsInR5cCI6Ikp...
Bearer tokens are generated on a user-by-user basis. When a user is added using the /integration/user.add route and activated using the /integration/user.enable route, they are eligible to have a token generated for them. See the section on User Management for a more in-depth look into how user token management works.
There are two ways to obtain a bearer token to use when making requests:
Capture the bearer token returned after the one-time connection setup using /integration/connect. The first time you connect an integration using credentials, the API will return a bearer token encoded to a default user in the response body that can be used to add and activate any/all other organization users.
Generate a token using the /authentication/generate.token endpoint
Credentials should be included in the Authorization request header in the following format: Credentials key**secret. Make sure to include the ** delimiter between the key and secret. See the section on Establishing an integration connection for details on how to obtain credentials and how to use them.
This section explains the minimal request headers expected and required by this integration API
content-type if you are sending content in a request body, make sure to specify its content-type. This content-type must also be accepted by the endpoint. Check the docs for the endpoint you are sending to.
accept currently this API only returns content in the application/json format. Thus, an accept header that is set to any value other than application/json or */* will return an error.
authorization most endpoints require some kind of authorization via either Credentials or a JWT. See the Security Section for more info on these schemes.
connection we recommend setting this to keep-alive
This section details the response headers your platform can expect to receive from requests to this integration API
x-powered-by expect this header to be express
connection this will match the value specified in the connection header of your request. If you did not specify a value, it will likely be set to keep-alive
content-type this will be set to application/json
date this will be set to a date timestamp for the request in format like Mon, 13 Feb 2023 15:57:07 GMT
keep-alive this header will be present on a connection set to keep-alive and will specify a timeout like timeout=5
Here are some good rules of thumb for your request body
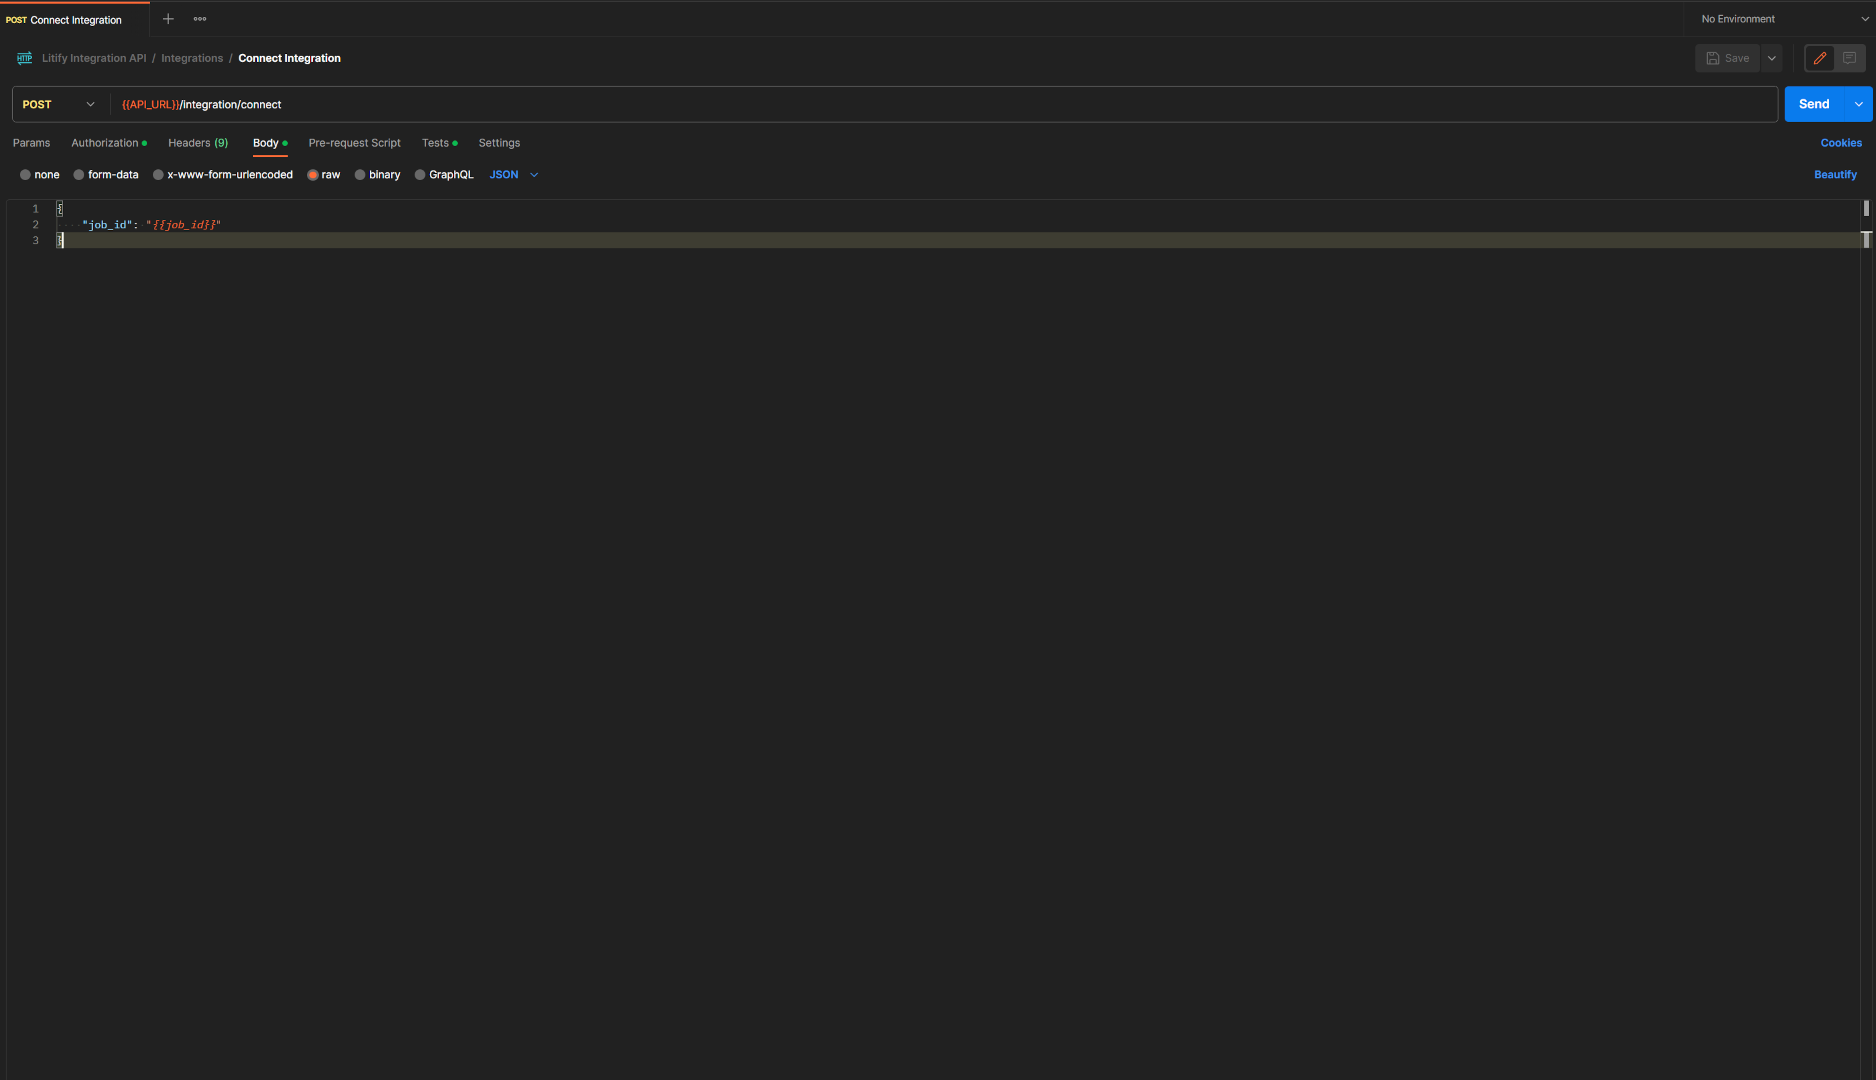
The API tries to adhere to most of RPC protocol guidelines. Thus, you will need to provide a unique job_id string 16 chars long for any routes that require it in their docs. This job_id can be randomly generated by you. The job_id may be a prop in the request body or a param in the url depending on the request type. Check the route documentation. This job_id will usually be returned in the response body. However, other than that, the rest of your request body can simply match the doc schema following your content-type. An example request might look like:
{ "job_id": "7f8db9d8cdf8e7rc", "referral_id": "63e5ddd8bef539001706510b" }
Ensure your request body formatting and syntax match your content-type header value to avoid 400 status codes.
The API accepts either single quotes ' or double quotes "
Make sure to properly encode any special characters in your URLs, params, and request bodies.
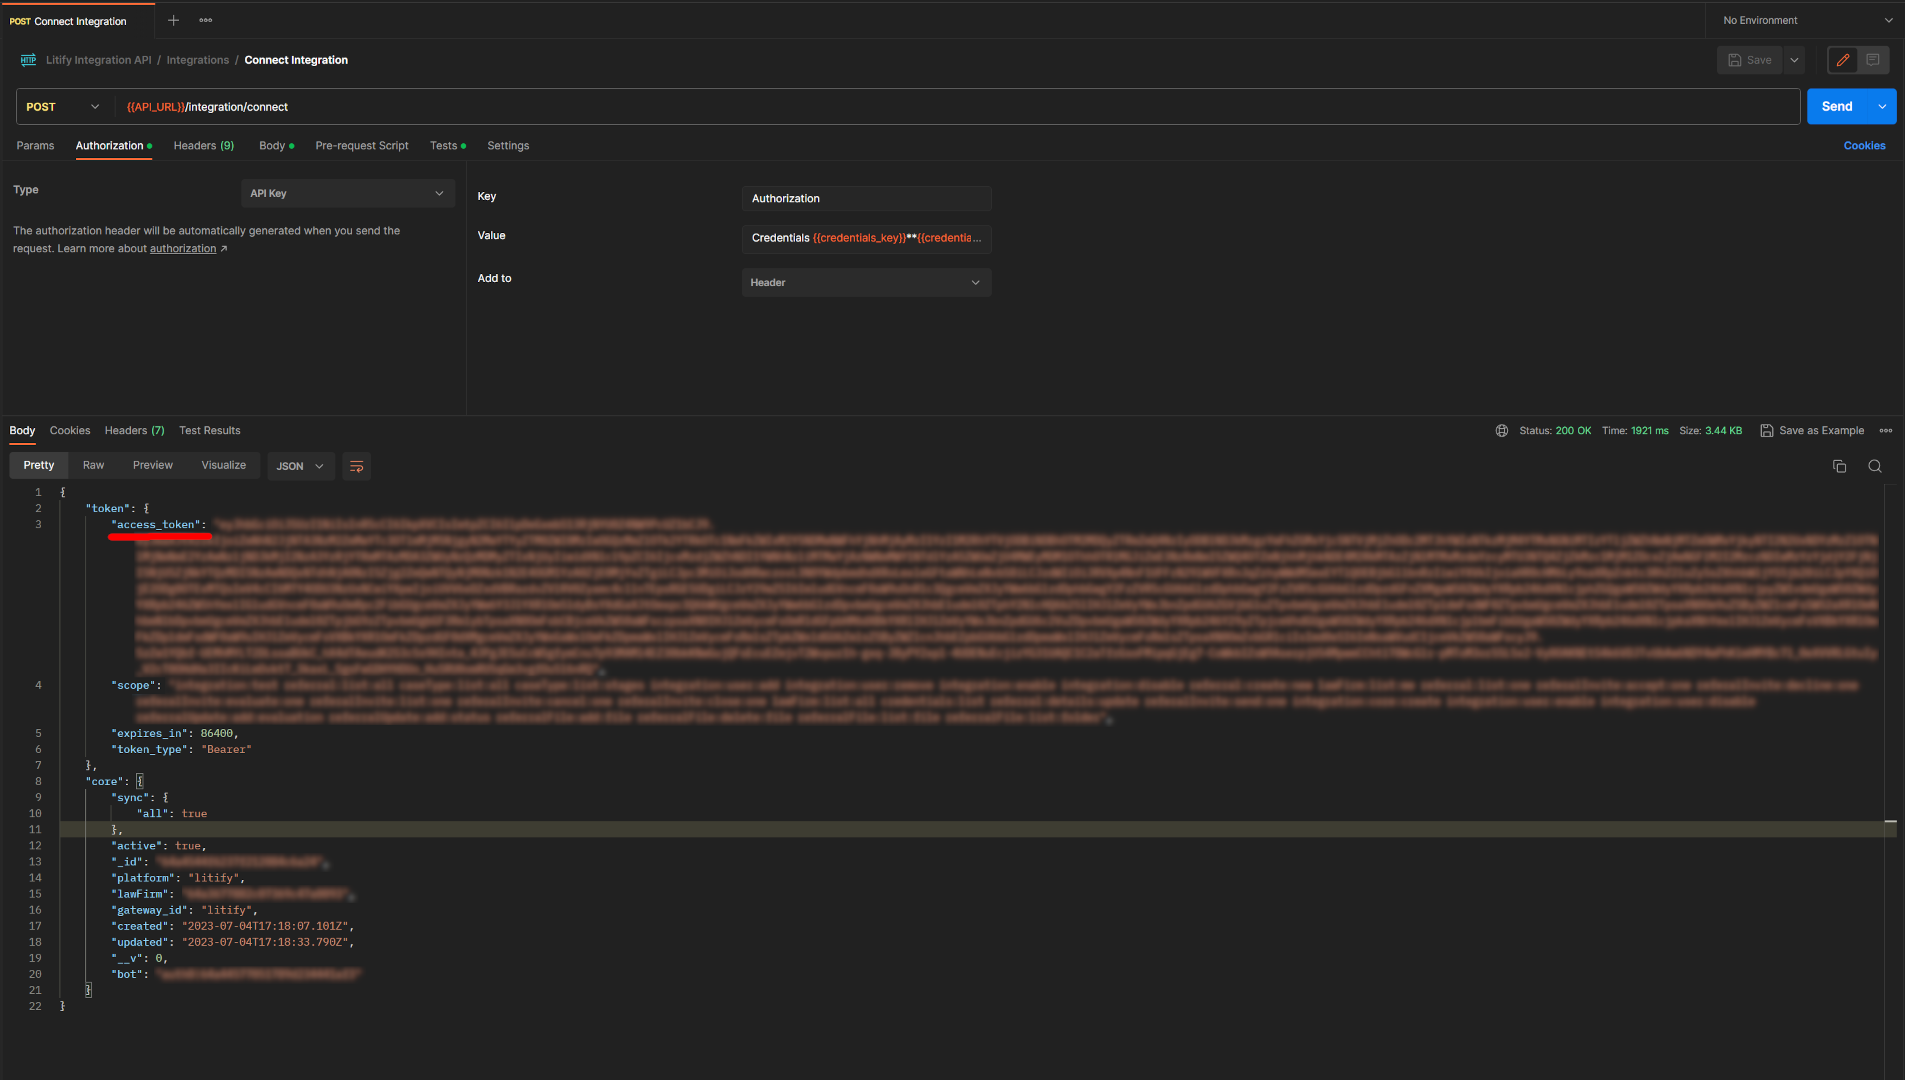
This flow will walk you through initializing a integration connection and generating credentials on Lexamica, and then finishing the connection from your integrating platform. In this example we will be connecting a Litify Integration, however the basic flow applies to all integrations.
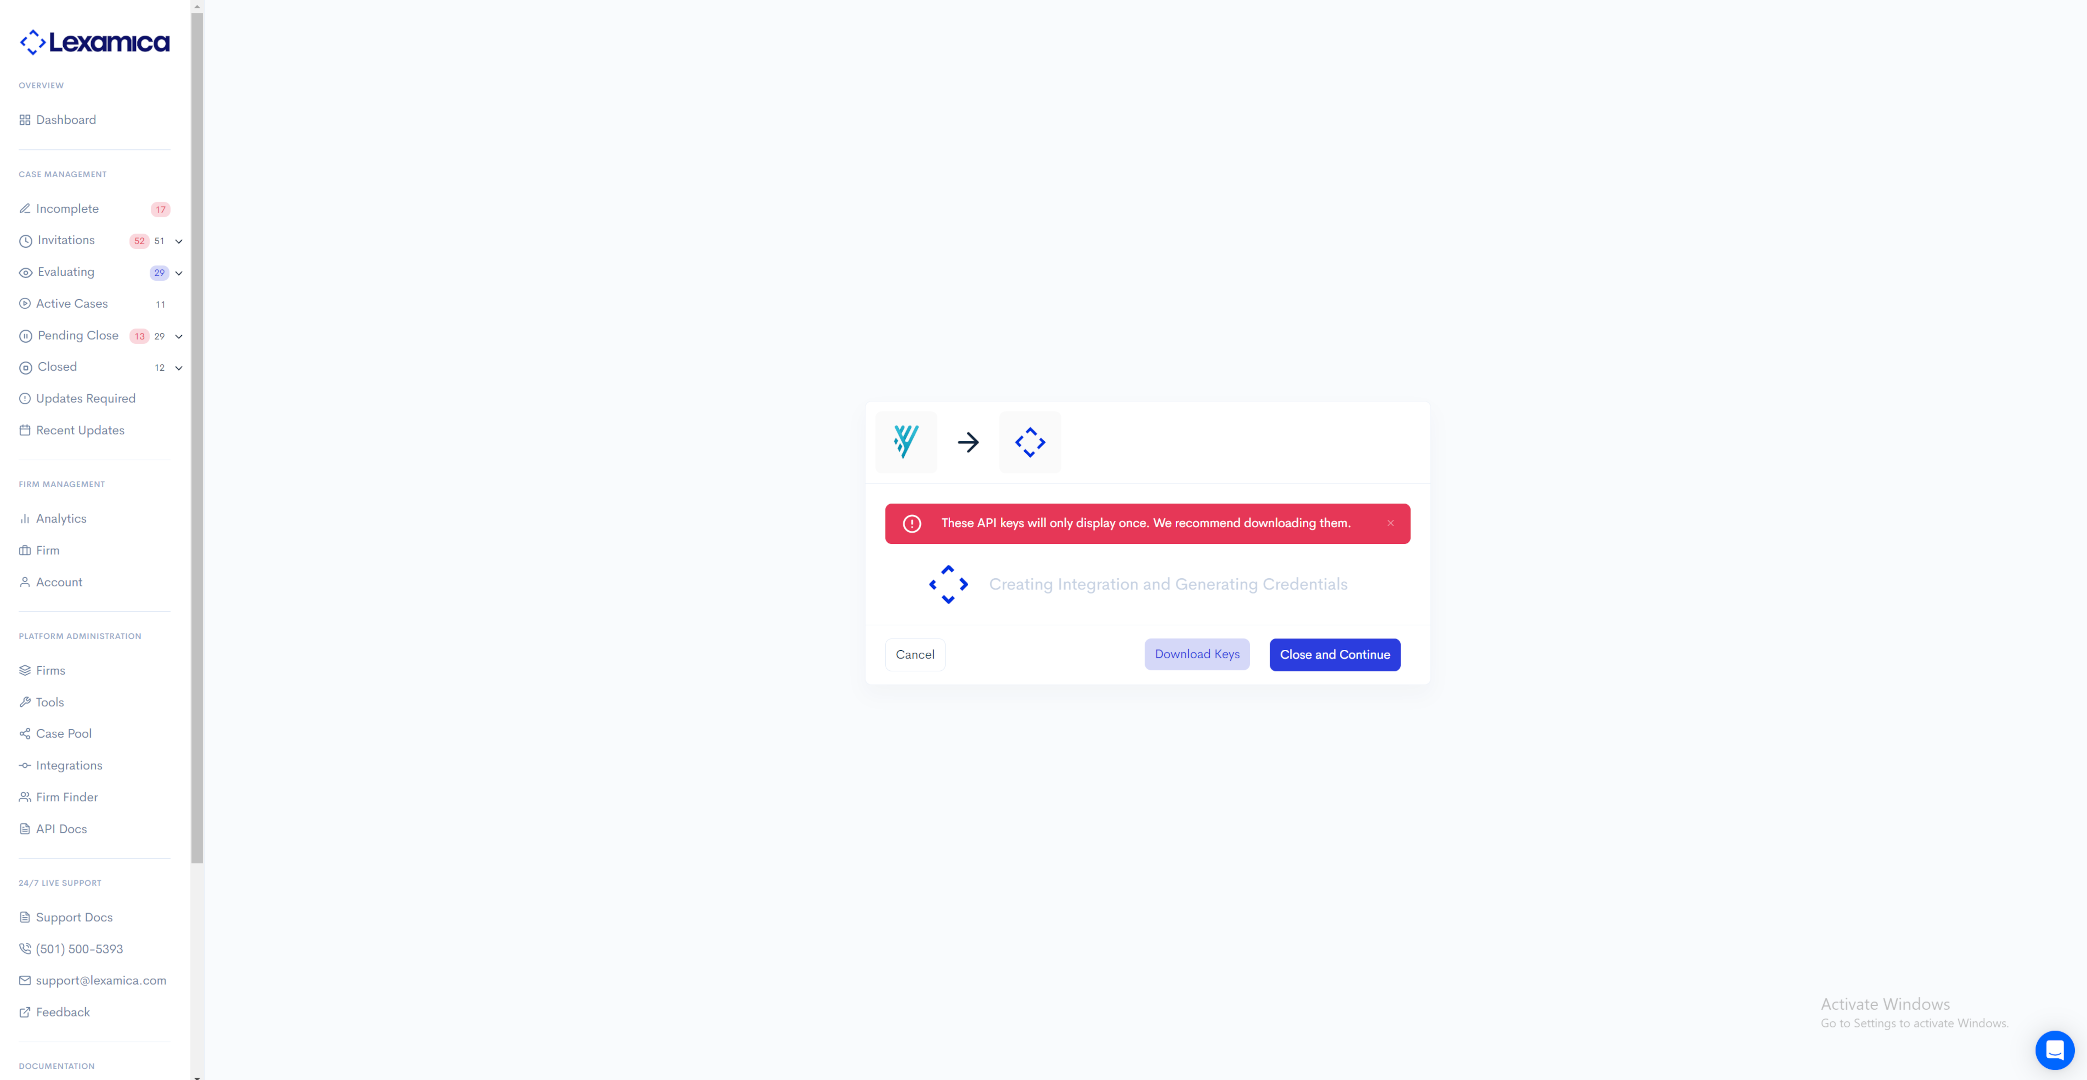
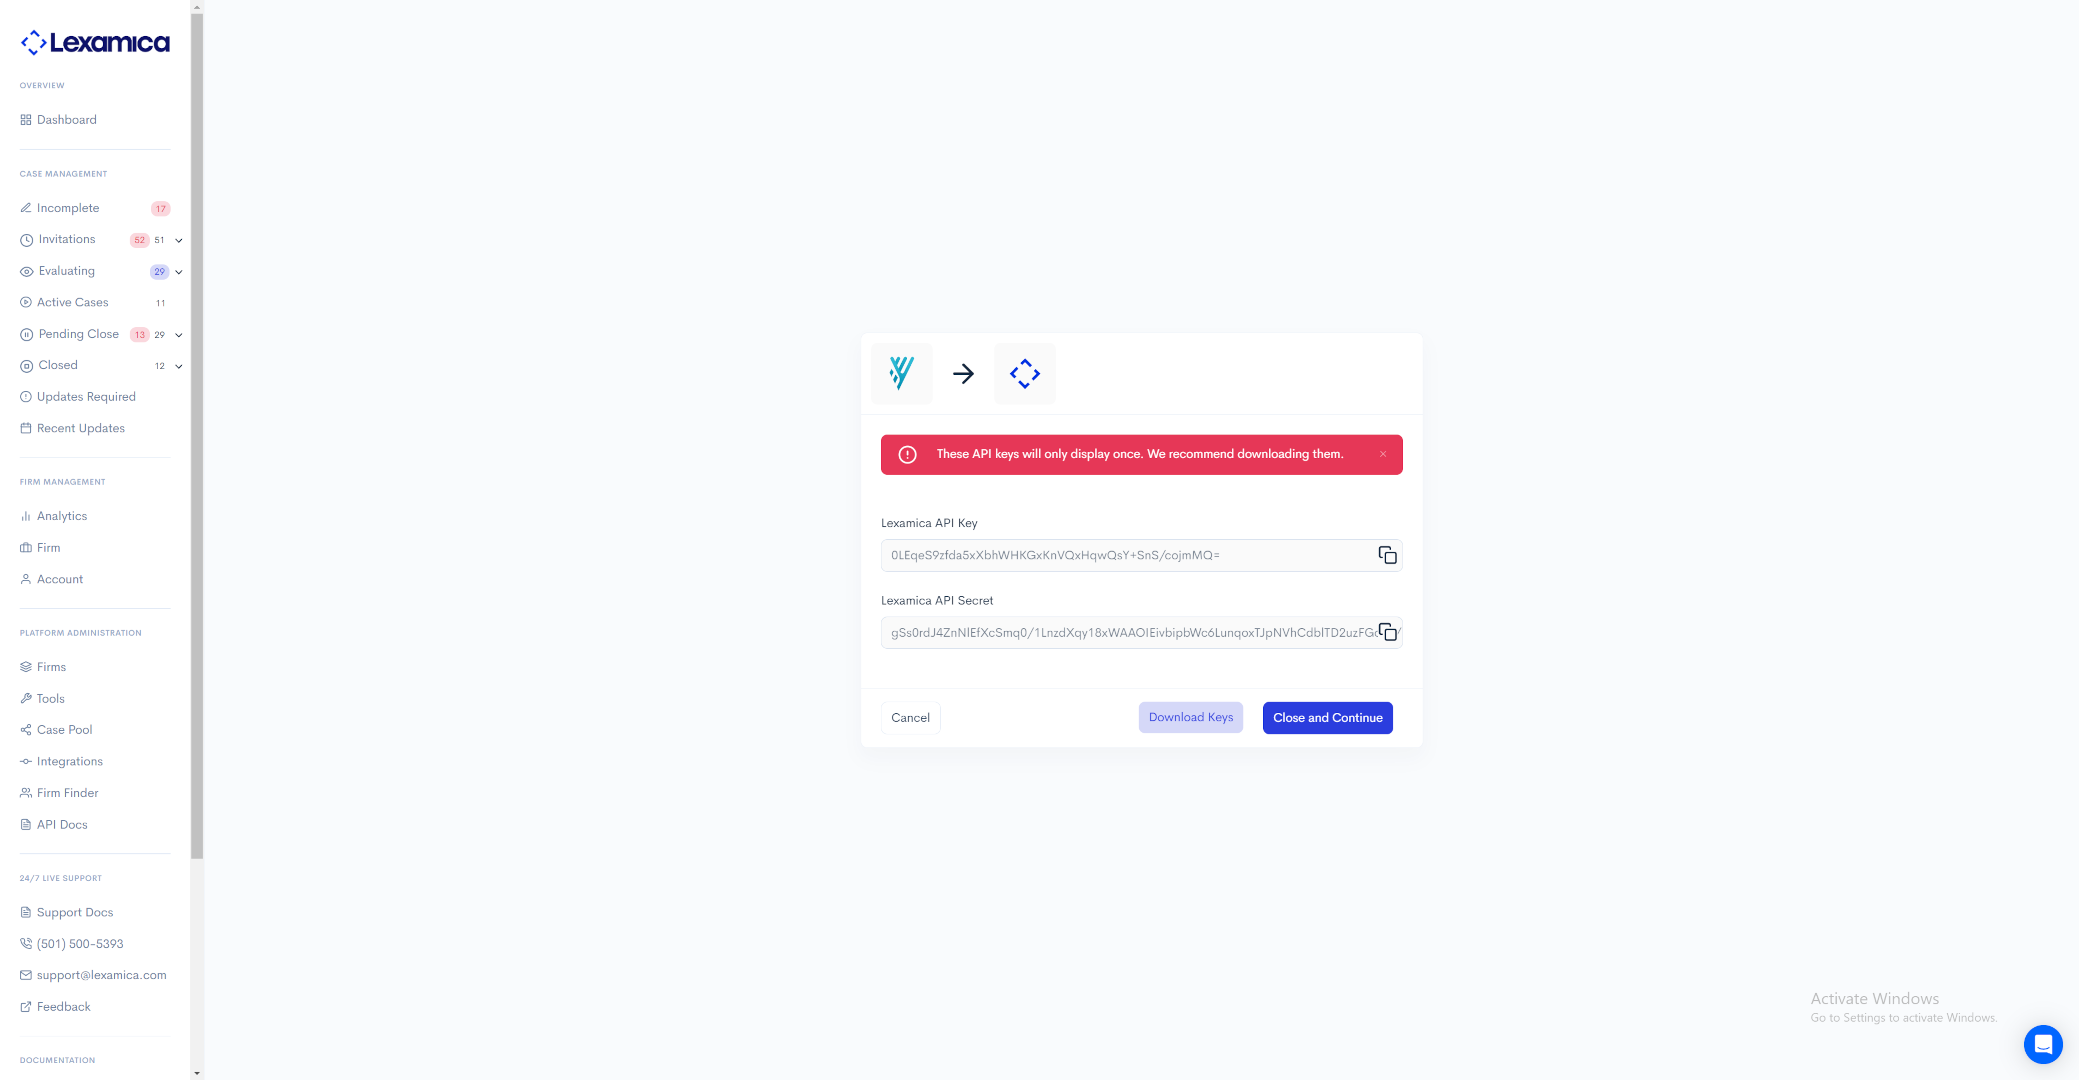
/integration/connect route following the route documentation. Make sure to include your credentials as your authorization. See the Security Scheme section for instructions and formatting.
Bearer Token returned in the response. Congratulations, the organization's integration has been connected! Now proceed to the User Management section to add and activate all organization users.
JWTs are generated on a user-by-user basis. However, you can also only generate a global token for your default user connection. For more info on this, see the guide on User Management.
To generate a JWT, make a request following the documentation given for the /authentication/generate.token endpoint. Your Authorization header should contain the Lexamica Organization Credentials. If you don't know what those are or how to use them, see the Credentials portion of the Security Section. The user_id prop is the unique ID for an existing, active user connection.
A successful token generation request will return the access token for the specified user. One of the props returned will also be a expires_in prop that should be used to manage your tokens so that you don't generate a new token until the old one has almost expired.
Lexamica reserves the right to throttle your integration's use of the /authentication/generate.token endpoint if we determine that token expiration is not being respected. An example would be requesting a new token before every subsequent request without any regard for previous token lifespan.
This flow will walk you through adding and activating users to an existing organization integration connection. This flow assumes you have successfully established a organization integration connection. If you haven't, go to the Establishing an integration connection section and complete that first, then come back here.
Integration Users/Connections are representations of individual users who might all be using the organization's integration simultaneously. Each Bearer Token is encoded to a unique user_id within the organization. This allows auditing for which users perform various actions resulting in integration actions in Lexamica. This granularity also enables activating and deactivating of users individually. Thus, you could deactivate a certain user_id and keep all others active. This would cause that user to be unable to perform integration actions via the API, but would allow all other users to continue uninterupted. However, we also understand that your system may not care to distinguish between which users are performing integration actions. In that case, read on to our next question...
Adding and managing individual user actions has a lot of benefits mentioned above. However, for a variety of reasons, you may just want to use a global connection for your platform. Fortunately, every time you connect an organization through the /integration/connect endpoint, a default connection is created with a random, unique user_id. This default connection ID will be listed in the users prop returned when an integration is first connected using the /integration/connect endpoint. This allows you to get a JWT encoded to the default connection using the /authentication/generate.token and use it globally in your platform for a particular organization. However, note that by doing this, you will not be able to get audits on which users perform actions as all actions will show as performed by the default user. You will also only be able to activate/deactivate your integration globally since there will no user granularity. This user connection scheme is most suited to platforms with rigorous internal user auditing and RBAC.
/integration/user.add allows you to add one or more connections in a batch format. Each user connection requires a few data props:
user_id a universally unique identifier. A universally unique identifier would be something like an email address. Some DB primary keys may be universally unique, but this is not always guaranteed. If your chosen ID is already in use, you will get an error for the user.
first_name you can optionally give a user's first (given) name here.
last_name you can optionally give a user's last (family) name here.
email you can optionally give a user's email address here. If a user exists already on Lexamica with that email address, we will automatically link the user's integration actions with their native Lexamica user profile.
/integration/user.remove allows you to remove any existing user connections in a batch format using their ID.
/integration/user.enable allows you to batch activate any existing user connections that are currently inactive.
/integration/user.disable allows you to batch deactivate (block) any existing user connections that are currently active.